Documentation
Our support team is here to help: support@keak.com
Introduction
Keak automatically generates variations of content likely to have an outsized impact on your website conversion rate (Headline, Copy, CTA). We automatically launches A/B tests between your original and the new variations it generated, splitting traffic between your initial content and the variations two at a time.
When tests reach statistical significance, Keak saves the results and feeds them into your own AI model to fine-tune future variations. A new test is automatically launched every time the previous test has concluded and your model has been fine-tuned.
Keak will repeat the process until you pause it. Your website will be generating variations, A/B testing them, and using the results to improve the model generating your variations 24/7 until you pause it.
How it works

How to launch a new test
To launch a new test you will need our extension (available in the chrome web store). Once it's installed, visit your website and open the extension. Please note that you will have to sign-in/signup for Keak before being able to use to extension.
Once the extension is open, double click on any text on your website to start modifying it.
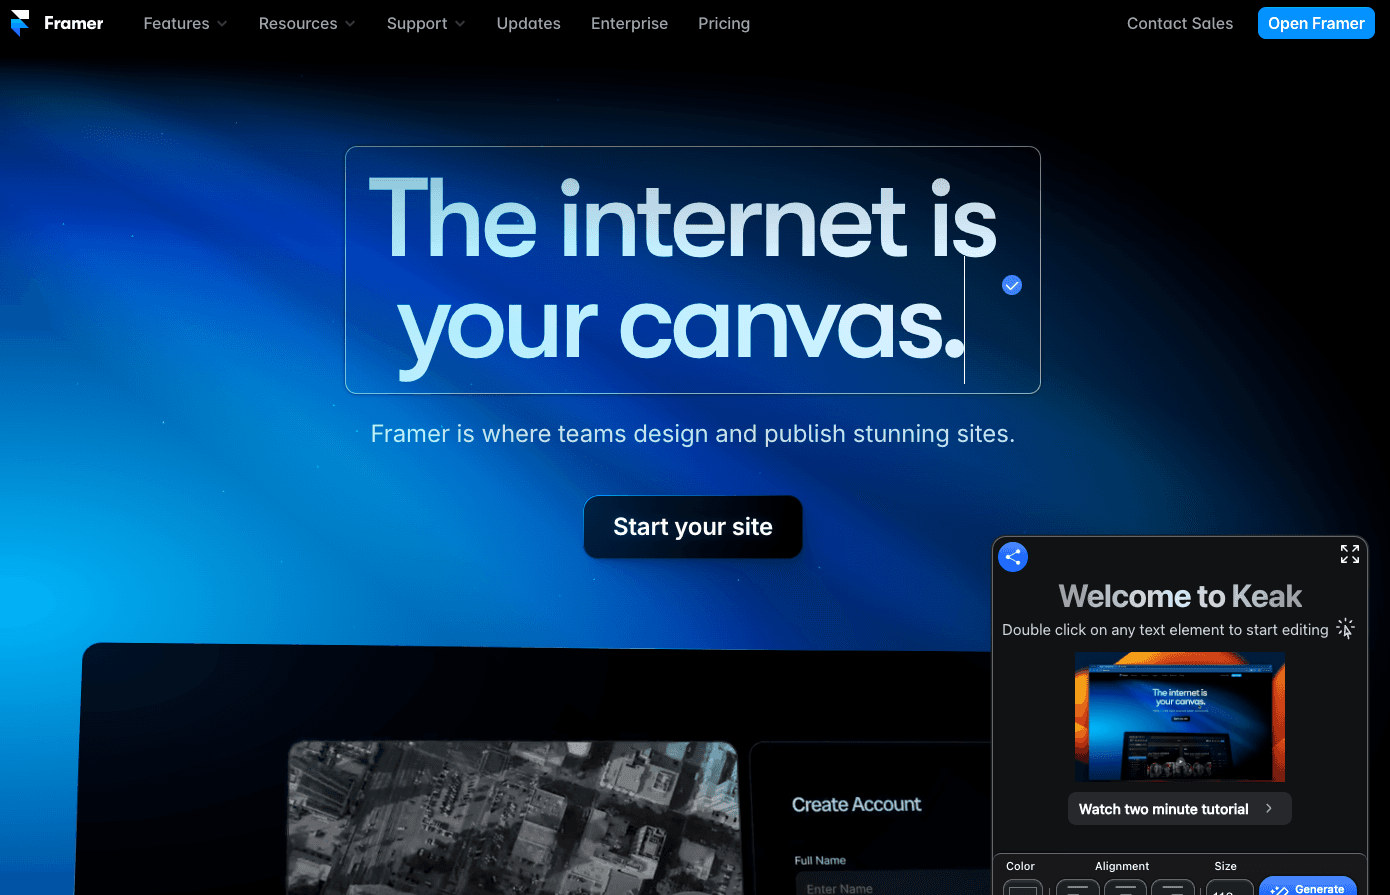
A bounding box will appear around the text you are modifying.
You can now either manually edit the text or generate a variation with our fine-tuned model by clicking “Generate Variation” in the Keak toolbar.
If you are making manual changes, you will need to lock in your changes by clicking the white and blue checkmark inside the bounding box before being able to launch a test.
If you are using our model to generate variations, you will be able to regenerate the variations by clicking on the “Generate Variation” button again.
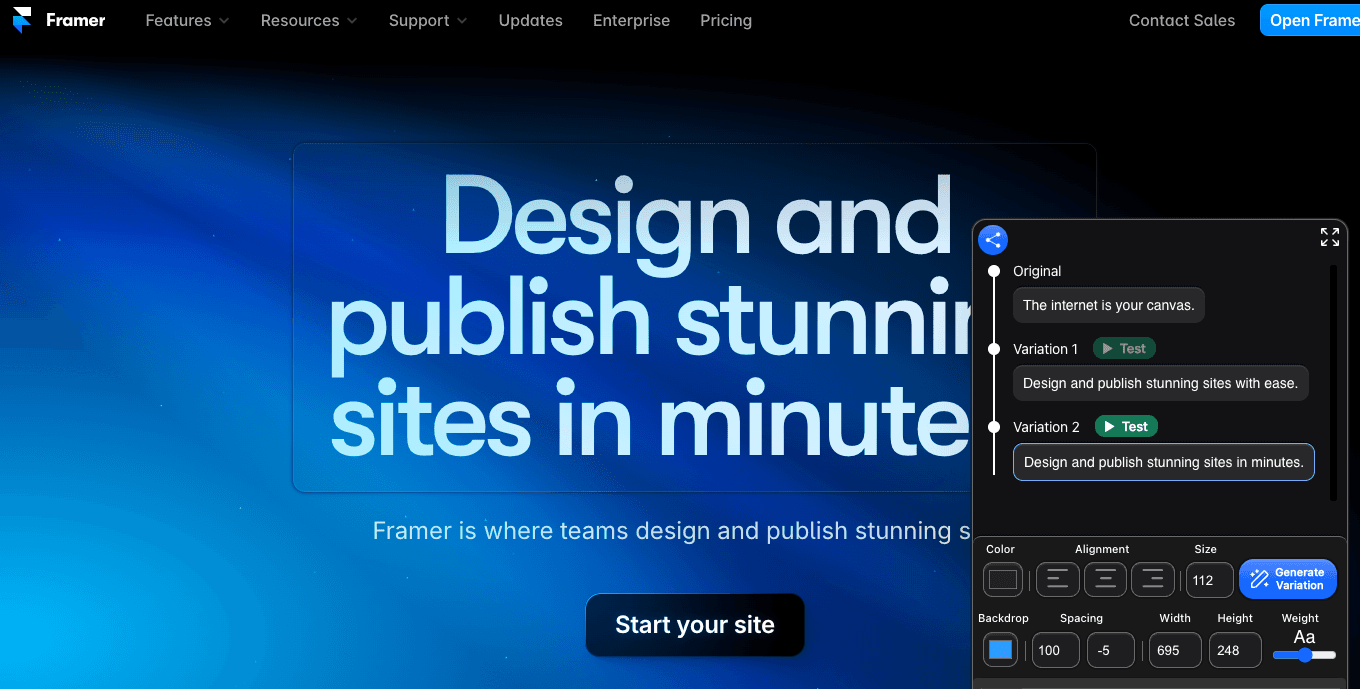
All the variations you generated of each element will be visible in the toolbar, click any element on your website to see all the variations you have generated for that element.
To preview how a variation will look on your website, simply click on the variation and your website will update with the selected variation.
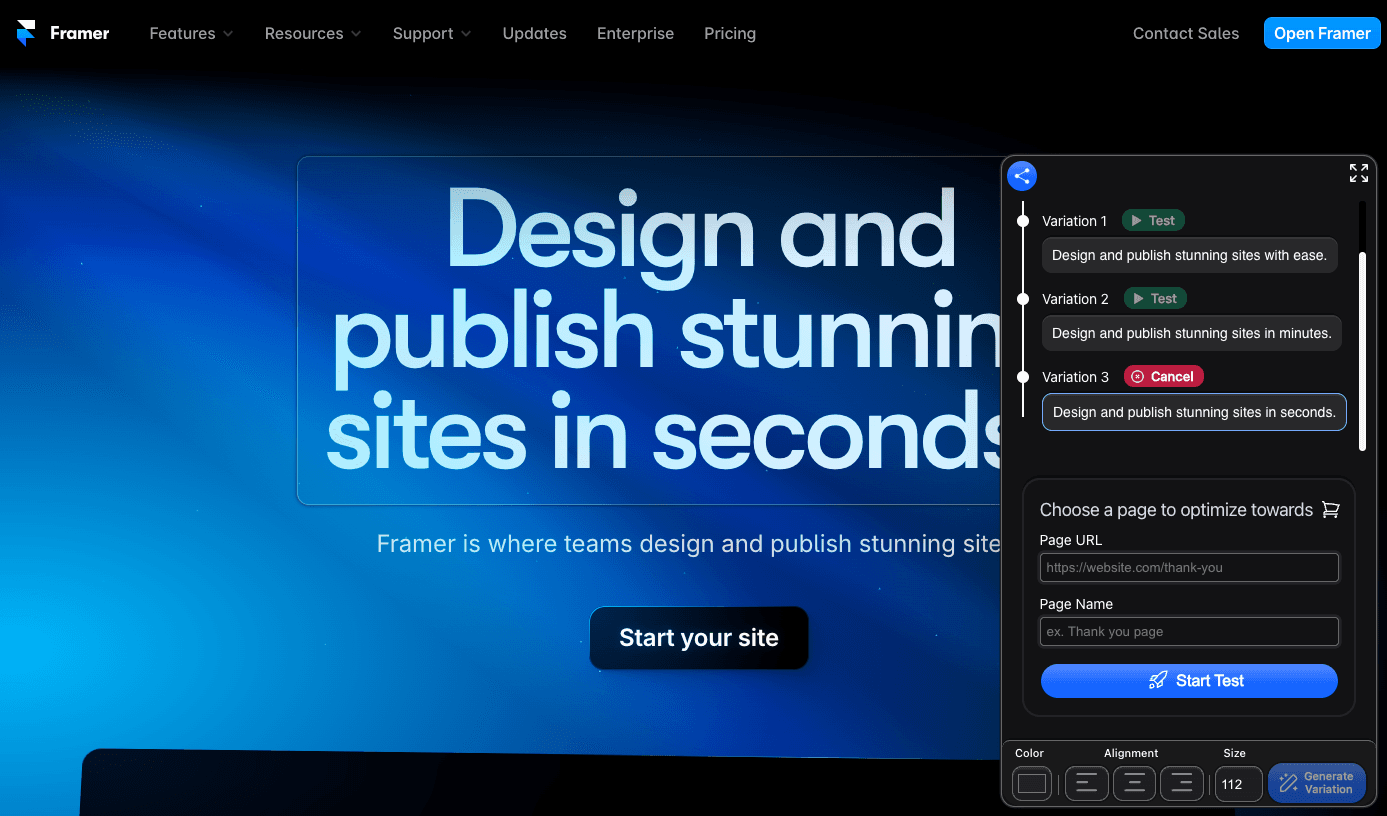
Once you are happy with your changes, start the A/B test by clicking “Test” over the variation you want to use.
Choosing a page to optimize towards
Keak determines the winner of a test by counting the number of visits on certain pages of your website.
A common practice is to use visits to your thank you page (or any other page further down your funnel) to determine the winner.
After clicking the “test” button, these fields will appear.
After clicking the “test” button, these fields will appear.
Page Name: Name the page or event associated to the page, something like (Purchase, Lead, View More, etc).
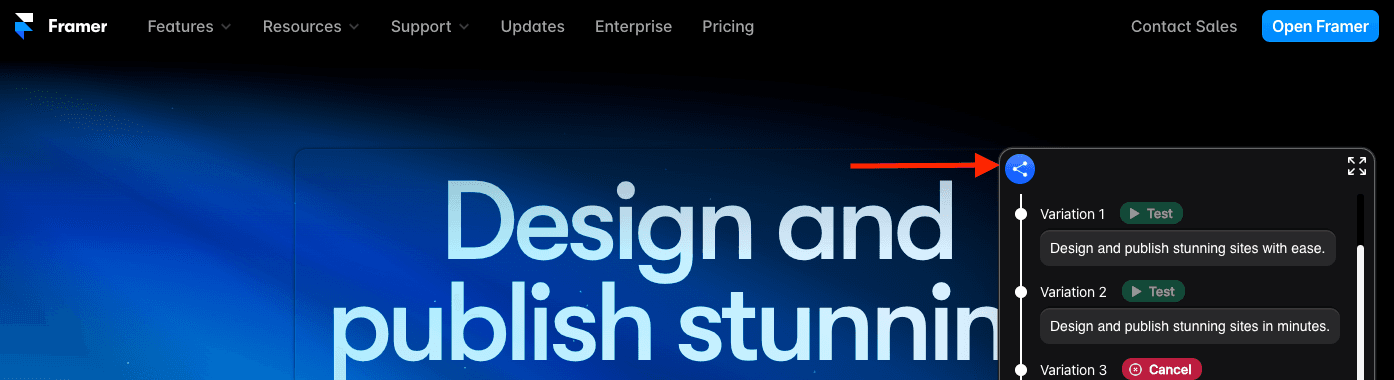
How to share a preview of your changes
Keak enables you to generate and share a preview link of your changes.
To generate a preview link, click on the share button inside the Keak toolbar.
Keak will automatically take a screenshot of your page and host it (this might take a few seconds). Once it's done, the page will automatically open and you will be able to copy and share the URL.
Adding a new domain
When you sign up you will be asked for your domain and we will auto create a workspace for it. Adding additional domains can enable you to segregate access, reporting, and event tracking.
- Click on your domain (top right of your window, next to your name)
- Click "Add Domain"
- Enter the name of the website and the domain
How To Install Our Tracking Pixel
You can place the same pixel on all your pages, you do not need to install a new pixel every time you start a new test.
The Keak Pixel is a snippet of JavaScript code that allows you to track visitor activity and modify your website when a new test is launched. It works by loading a small library of functions that you can use whenever a site visitor takes an action (called an event) that you want to track (called a conversion). Tracked conversions will appear in your reporting dashboard and in your test details.
We will provide you with your Keak pixel after you launch your first test.
To install the Pixel, we highly recommend that you add it between the opening and closing <head> tags on every page where you will be running tests or tracking website visitor actions. Most developers add it to their website's persistent header, so it can be used on all pages.
Placing the code within your <head> tags reduces the chances of browsers or third-party code blocking the Pixel's execution. It also executes the code sooner, increasing the chance that your visitors are tracked before they leave your page.
- Click "Event Manager"
- Click "Add Event"
- Pick how you want to track the event (you can use page views or button clicks). If you pick page view, you will be asked for a URL to track. We will fire your event every time someone visits that page. If you pick a button, you will be asked for the CSS of the button and we will fire your event every time someone clicks on it.
- Name the event you want to track
- Click "Create"
Now that you've created an event, you can track your conversions and use them as the metric to optimize your website.
You can create as many events as you like.
If you want to modify your event, visit the event manager and click on the event you want to modify or delete. Please not that if you delete an event, all the data associated to that event will be deleted.
How is the statistical significance calculated?
Statistical significance is calculated every time a user visits your website so that each of your tests are shown to the lowest amount of people possible while maintaining their integrity.
- The current confidence level has to be higher than the minimum you set
- The amount of impressions on your test has to be higher than the minimum you set
The confidence level is set by you and expressed as %. We recommend using values higher than 90%.